↧
Musica
↧
Review: Jar's Basing Class II

Good Morning Jungle,
about a week ago Roman's second - and this years last - basing class took part in Augsburg, Germany.
Participants arrived from all corners of Germany and even Swiss. It felt like a little family meeting with most of the painters already known to Roman. Thanks to everyone who took part in the class and made that weekend such a nice one.
We had a great time during the class and much about basing composition and its practical use was learned during the weekend. You can find the review of the first basing class here if you like to read it too. The basing class will return in summer 2015 with another topic/theme for the base and different material tasks for the students.
Let's jump Roman's brain now for the review ...
________________________________________________________________________________

Well, again I'd like to start with my aims and teaching focus for the class:
- Introduction of composition rules/asthetics
- How to use composition rules/asthetics on a base, in material parts, in detailing
- Building a base from concept to end
- Gaining a better look on the outside world and learning to see "random beauty"
- Basebuild-up with material focus on the topic "After the Apocalypse, nature conquers back!"

Thanks forsupporting and sponsoring the class
First of all I want to say big thanks to the sponsors of the class. These companies who supported the class with material and their help in making ideas real. Without those helpful hands the class would have not been the same:


Additional thanks to Battlefield-Berlin,
BrokenToad and Uschi van der Rosten for their support.
Thanks for Participating
I want to say big thanks to all the students who attented to the class for putting their trust in me and what I am trying to teach. I was really happy to see many friends and kindpeople among this group, painters I already know since several years, some with more experience than others, but I was about to raise their basing skills to another bar, no matter their experience level. At least this was my plan. Thanks for a cool weekend with you all and sadly two participants had to skip this weekend because of illness and work.

Thanks for additional photos
Thanks to Oliver and Jens for additional photos to this review.
Friday - Composition, Concept, random beauty
Now let's head over to the class content and what we did. This review will take a little different approach as you will find Oliver's comments and photos in between my blabla to see the students perspective too. Thank you, Oliver for putting this up!
A big thanks to the the first class group from August for their feedback. I tried to implent a lot of improvement from the last class to this class and I think it helped it a lot.
Again we started Friday in the "postapo-classroom". Did a lot of theory about a base, did some sketches and everybody got into some plans of his upcoming base using basic rules and thoughts of asthetic composition rules well known out of art history. Everybody had to draw a random postapo modern survivor model by Hasslefree to find his character of his base.
Let's see what Oliver got to say about that:
"Hello everyone. I had the pleasure of visiting Jarheads Basing workshop and will give you some insights. Friday evening was mainly theory. After some impressions to get a feeling for the topic "After apocalypse the nature takes the world back" everyone drew a miniature and should picture it in a typical scene. I found someone to exchange my first draw and got this lovely lady:

In my mind formed the picture of an explorer looking for lost treasures from the old civilization. And there is no better place to go than the sewers to do so. The next task was to scetch the idea and try to optimize it. I should not do it, but this are my conceptual drawings from this evening:"


Roman again. Well, some people think they can not or should not draw. I'd say screw that. If you draw something to visualise your thoughts for you the result does only matter for yourself. Oliver's sketches helped him to visualize his ideas, you will find out soon when we dig into Saturday. Everybody can draw such things for himself, no excuse needed there.
Friday's last task was "real life size basing". We took the theory to a test and it was also time to move our bodies to carry around all that gathered material.

The group planned together ...

Hero's were born ...

Fun we had indeed ...

Saturday - material preparation, building of the base
Saturday arrived and we did start with a little theory again on how to work in different base stages. I explained the upcoming tasks to the students and work started right off. We worked in two groups, everybody preparing something important later on to bring all of it together.
The Friday night sketches were now a good help ...

Concentration all around ...


Thanks to our sponsors we had a lot of material ready:

Some really feel in love with those Juweela bricks:

Oliver:
"On Saturday morning we started working on our ideas. My first task was to cut the socket and build up the wall. Afterwards the ground was covered and some scenery added. Some of the parts of the scenery were created by using plastic card and aluminum sheets. The final details were added to show how the nature comes back."


Roman again. While everybody took their well deserved dinner in form of pizza delivery I had some bretzels and went through the students places to take photos of their Saturday achievements:


Well, me, the teacher was really impressed what this class achieved here. I could already imagine the mood some of these pieces would bring if they see colour on top.
It was a pleasure to see and help these grow. How the students came up with a concept on Friday night, transported it to their big material preparation and brought all of it together during Saturday.
The last hours of Saturday laid focus on detail work and making everything ready for priming on Saturday. Hard work on Saturday, but worth it I'd say.
Sunday - Priming, Colour Start, Nature strikes
It was time to start with "sketch painting" the base and getting more into it. Preparation for bringing in the nature stuff soon! But Priming was first.
Oliver:
"Sunday started with priming the base and applying Jarheads cool wet in wet technique ..."


Jens - I mean one of the three Jensens at place, made some photos too with his mobile to show a little progress on his basework, very cool - thanks for that, Jens:

Roman again. Well, we took our time to paint on that base and in the middle of it there was more theory about how to plan and execute real looking natural looking greenery on that base, but honestly you can say that Friday and Saturday took their tool and the class was approaching its end faster than usual. At least it felt like. Now let's check for some results, shall we?


Summary from my point of view
Well, I was truely happy with the results the students achieved during this weekend once more. I was truely happy to see the feedback from the first basing class take a grip on the second one. It was my pleasure to see you at this weekend, see old friends again, meet new faces - hope they paint on and on ;) - and want to thank you all for being a part of this weekend, thank you for your time, your patience and your will to learn from me. Thank you!
Keep on happy painting and basing!
Best Wishes,
Roman
PS:
Oliver:"A lot of pictures but I think you get an impression what this workshop was about. I am very glad that I decided to go there and will try to finish base and lady within the next week so I can show some final pictures."
Roman: YAY!
↧
↧
Step by Step: Your Waaaghh ends here!

Hello Jungle Painters,
again, you decided via Massive Voodoo's year of the painter'slast Tutorial Voting which article should be up today. The Winner lead us back to a little time travel to the year 2012 and a project called "Your Waaaghh ends here!".
The project was a comission for Mati and Roman for a private collector from the US. While Mati sculpted the unique models, Roman did the paint- and basing job.
This article gives you insight into the project, a walkthrough on the journey to see this one finished. It is going into little details here and there, but is not giving exact painting recipes for particular areas.
Let's start and see what Roman has to tell or at least how much he remembers, eh?
________________________________________________________________________________
Well, 2012 - it's been a while. So where is my mind and memory?
FOREWORD
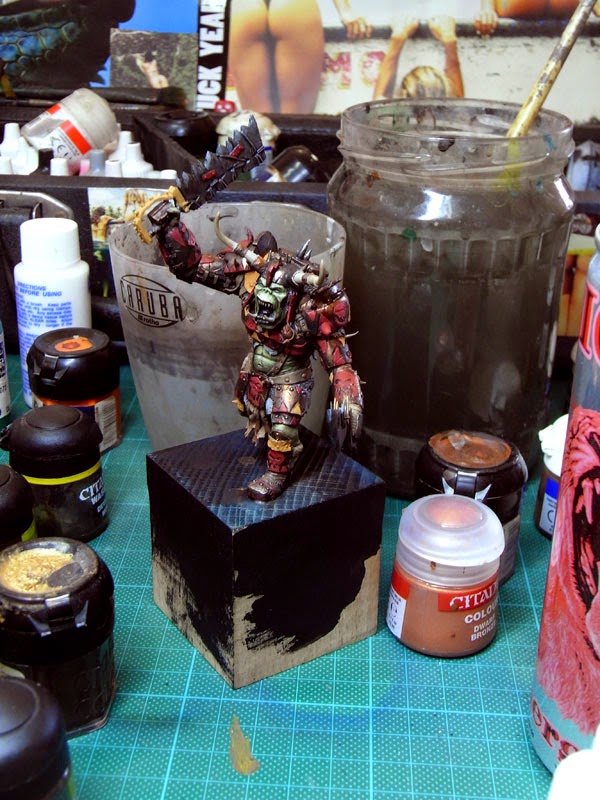
It felt really cool to be comissioned with this project. I mean Mati sculpting unique sculpts, which are only meant to be placed into this piece. The comissioners vision came from a computer game trailer and shows a Waaagghh-Boss whos path is blocked by a stubborn Dwarf Slayer.
I was really anxious to recieve the pieces from Mati via postal service as soon he would be done. Meanwhile I prepared my mind with some sketches for the base to catch the scenery and athmosphere of the trailer.

I found a cool root piece which I got from Sockelmacher.de and planned to use it on top of a more expensive black plinth. So far to the plan.

After a little while the sculpts arrived and I placed some brass etched runes to the Dwarf's axes. Cool Stuff by Secret Weapon indeed. Sadly I do not have any photos of the Orc sculpt, but I found some on Mati's Putty&Paint Profile - check here.

THE PROJECT PROCESS
Well, the first thing I did was priming the models black and white
to get them ready for painting.

For the base I started with the sketch in the back of my head and did some sawing of that wood piece, pinned it with thicker iron bars to the black plinth and added some roots via superglue and Milliput on top of it. Just to get an idea.

I already did some really simple colour applyments to the models - metal basic to the Orc and skin basic to the dwarf. You can see it here where I checked for the poses of the models on the base.

Soil and siege rubble on that base and I was happy.![]()

Check again.

Something was missing in that rubble and I sculpted two wooden shields from Magic Sculpt. You can do your own armoury too - check this article!

Painting the base was truely fun as I love to sketch my way into it using a technique that mixes the colours wet in wet on that base. It's a sketch nothing more, but fun. You can find this particular technique used and explained in the Step by Step of the Nightwatch.


Sometimes you can not do this technique with a small brush, so I recommend using a slightly bigger one.

Ok so far for the base sketch I went back to the Dwarf and put some time in his different materials, first sketchly preparing all different materials.

Working my way further by adding highlighst and shadows to these different materials.

Did the same to the Orc, starting slowly to find all that different material. Honestly, the Dwarf was more joy as the Orc had so much different stuff going on to drive me mad. Orcs, eh?
Added more detail to it and made ready for final details on Orc and Dwarf.

Means more contrast here and there, stronger edge highlights on the metals and such.

Now it was time for another base check once again. These are very important for me to see if the whole thing works together.

Dwarfy here recieved some more details in his areas, like more contrast in the skin, tattoos, some wounds, details on the leather, work on the metals and highlights on his hair.


A little colour variations to the skin ca work wonders. Not only skintone there but some purple, green, yellow ... fun and nice effect.


Sadly the I do not have any photos of the detail work on the Orc as this guy just drove me mad back in 2012 with his crazy detail stuff going on, but nevermind. If you are interested in Orc Skin, check this article over here!
Once again - check!

Something was missing to really catcht the mood of a battlefield. Yes, arrows.
You can find an article on how to create them with an accupuncture needle here behind this link.
I prepared many ...

I made their feathering out of tiny paper pieces ...

I placed these with matt varnish and after it was dry I painted them ...

I prepared some detail grass on a piece of cork. Glued it to the cork as it is easier to handle while washing, drybrushing and for removing it afterwards. Need an article about detailed grass?

FINAL RESULT / CONCLUSION
Well all in all the project was a not an easy one back in 2012.
Its size, both models are in scale 54 mm and that base went huge. It was a lot of fun though and the customer, Mati and I were happy with the final result of our collaberation.


If you like you can find more photos of it via Putty & Paint.
I hope you enjoyed the article even it is no detail step by step plan on how I did every single inch in this project. It is more a walkthrough that helps to see such a big project grow. I for my part do enjoy when the work happens at all pieces at once, meaning that they grow together to a final stage. First sketch, hard work, detail work. This helps me always keeps the mood of a piece together as I would just fail in this if I would paint one area to complete before going to the next one.
A little side-story on this project. It had to be shipped to the US and Raffa helped me carefully removing the pinned (!) models from that base again to be able to pack everything carefully in their own plastic boxes. So three plastic boxes were used for the dwarf, orc and base all wrapped up in a bigger box for shipping the miniatures.
What do you think? Can the little Dwarf stop the Waaaghh! just in that particular moment?
Do you see the right purpose in his eyes? Or is he just dead meat?
So far, keep on happy painting!
Best Wishes,
Roman
PS: Find more Step by Step articles here!
↧
Jungle Interview: Spencer Davis, Booty Babe Art
Good Morning Jungle,
today with something different but yet very cool we are sure of.
![]()
A Jungle Interview with Spencer Davis, Artist and Owner of Booty Babe Art.
Spencer took the time to answer some jungle questions aimed at him and about his beautiful range of custom toys, volouptous ladies in all kind of fashion and styles.
Custom Toys? But Massive Voodoo is about Miniature Painting and Sculpting. Fair enough, you are right, but frankly you will see that our miniature hobby is connected with many other interesting communities outtthere, not only our own.
Enjoy this first one of many different Jungle Interviews to come.
Thank you Spencer for your time and answers.
Homepage: Booty Babe Art
Facebook: Booty Babe Art by Spencer Davis
________________________________________________________________________________
![]()
1. Tell us a bit about yourself, about the person behind "Booty Babe Art"?
Yeah, as my Bio states: I was born in Los Angeles, but I grew up in rural Oregon. I think this is relevant to the story of Booty Babe Art because I was mostly growing up with other thin, white people. The girls I knew growing up ran on the cross country team or played volleyball. So it wasn't until much later that I would discover ...booty :)
![]()
![]()
2. How did you come to make sculptures of such voluptuous cool looking ladies? When did this become your passion and when did you turn it into your work? Tell us about the story of "Booty Babe Art"?
Well, I studied Industrial Design in college. So I am an artist but I am also thinking about art in terms of objects or commercial products that can be reproduced. When I was working in the toy industry I was also mixing with people of different disciplines, for example marketing, sculpting, engineering. It ALL interested me. I wanted to know how to take the concept from a sketch on a napkin to a packaged product on store shelves. But I had a particular interest in the process of making something tangible with my hands. So about two years into my career as a toy designer I made an effort to sculpt my first 'fantasy figure.' I used a skinny fashion doll as an armature basically, because my process is very 'hit and miss.' I'm slow. I make a lot of changes, and if I want, I can always run it through a bandsaw to tweak things and change the pose. It was also at approximately this time in my life that I realized that I am really into curvy women. I mean I have always loved Frank Frazetta's female characters. (Some of the female sprinters on the University track team raised some eyebrows too.)
But it was a chance encounter with a certain adult magazine, featuring women of 'color' that really opened my eyes. It was then that I discovered that I was one of the, perhaps not mainstream, but nonetheless very enthusiastic admirers of thick women. So once I had completed that first sculpt, I started selling them as resin model kits on eBay. Then I showed them at group art shows in Southern California, where the lowbrow art scene was in full swing. All of the feedback that I got from shopping them around informed my decision to take a huge leap of faith. And since I was not married and had no children at the time, I made a quick decison to go ahead and produce 3,000 statues(!) It was then that I realized, "Oh crap! Now I need to figure out how to market and sell these!"
![]() 3. What could be of big interest for the readers of MV: Do you work also in smaller scales?
3. What could be of big interest for the readers of MV: Do you work also in smaller scales?
I would very much like to. I'd like to do a series of more collectible, 3" inch figures or even a minifigure. I recognize that the 1:6 scale, statues are getting up there in price range. And that is going to prohibit some people from 'collecting.'
4. We have seen that you also paint, convert and even dress your sculpted models. There are many different versions and cool ideas executed. How do you plan such a unique version of a piece?
Many times the process is opportunistic. I surround myself with a lot of inspiring materials. Sometimes it's literally just juxtapositioning a few elements like, "Hey, I put this together with this and made this!" So sometimes the idea comes together fast, when I have all the pieces at my finger tips. Other times however, I have a clear idea in mind and it's a struggle to come up with the 'best' solution to make your idea a reality; Sometimes you are lucky and find a store-bought item that serves your needs. Other times you just have to make it from scratch, which of course takes a huge amount of time.
![]()
![]()
5. What is your personal favourite of your work so far and why?
One of my all-time favorites will always be "Pride of the Masai". There is something about very dark African skin tones that is very exotic and beautiful to me. I took a lot of care in making that one right and you can see it right down to the sacral (butt dimples) and fair palms. I'm still impressed that I was able to get that level of bead work from a production piece.
![]()
6. Where do you get your inspiration from?
Oh, these days - social media, magazines, going to the gym (believe it or not.) When I lived in SoCal (Southern California) I used to go to Venice Beach A LOT. I would rollerblade there and people watch and take pictures. Humanity is beautiful. I like architecture too. But there is nothing more beautiful than the variety of human.
7. Do you have rituals like music or something else if you are on the search for a new and unique idea?
I find that the best way to get inspired is to travel.
![]()
![]()
8. Your favourite song of all time?
Wow... Probably something Depeche Mode or Rage Against the Machine... I'm sorry I can't narrow it down to just one. I do love to listen to music though, when I work, ..or late night talk shows. I DVR them all.
9. Tell us your most crazy moment you have encountered with your work at "Booty Babe Art"?
Some women send me nude photos of themselves and it's like, "Here is what I look like naked. Now can you sculpt me?" And they will go into details about how they want their pubic region... stylized. I assume that doesn't happen to most people. I have received some pretty odd requests. But then again, the guy who first requested "giant areolas" had a good point: If a woman has giant boobs, there is a good chance that she may also have giant areolas. I don't judge :)
9. Your recommendation for someone who is interested in sculpting and wants to improve in that field?
Practice, practice, practice. It's like playing the guitar, or speaking a foreign language. You'll only get good if you dive in and do it. And furthermore, do it regularly. You will probably be able to sculpt as well as you draw. So if you have a good eye for drawing you are half way there. Then you just need to get used to the materials and the tools.
![]()
![]()
![]()
![]()
10. When and where is the next event "Booty Babe Art" is present?
Ah, thank you for asking. On November 8th and 9th I will have a booth at the 2014 Designer con, in Pasadena, CA. I like Comic-con but I actually like this convention even better, because it is specific to artists who create collectible, 3D toy / art. By that time I should have my six NEW Kickstarter funded statues delivered and in stock. And by the way, I have just launched a presale offer: FREE SHIPPING for all sales during the month of October(!)
Spencer Davis
Homepage: Booty Babe Art
Facebook: Booty Babe Art by Spencer Davis
__________________________________________________________________________
Keep on happy sculpting and painting
and may the booty spirit always be with you!
Best Wishes and thank you for your time, Spencer.
Want to read more interviews like this one?
today with something different but yet very cool we are sure of.
A Jungle Interview with Spencer Davis, Artist and Owner of Booty Babe Art.
Spencer took the time to answer some jungle questions aimed at him and about his beautiful range of custom toys, volouptous ladies in all kind of fashion and styles.
Custom Toys? But Massive Voodoo is about Miniature Painting and Sculpting. Fair enough, you are right, but frankly you will see that our miniature hobby is connected with many other interesting communities outtthere, not only our own.
Enjoy this first one of many different Jungle Interviews to come.
Thank you Spencer for your time and answers.
Homepage: Booty Babe Art
Facebook: Booty Babe Art by Spencer Davis
________________________________________________________________________________

1. Tell us a bit about yourself, about the person behind "Booty Babe Art"?
Yeah, as my Bio states: I was born in Los Angeles, but I grew up in rural Oregon. I think this is relevant to the story of Booty Babe Art because I was mostly growing up with other thin, white people. The girls I knew growing up ran on the cross country team or played volleyball. So it wasn't until much later that I would discover ...booty :)


2. How did you come to make sculptures of such voluptuous cool looking ladies? When did this become your passion and when did you turn it into your work? Tell us about the story of "Booty Babe Art"?
Well, I studied Industrial Design in college. So I am an artist but I am also thinking about art in terms of objects or commercial products that can be reproduced. When I was working in the toy industry I was also mixing with people of different disciplines, for example marketing, sculpting, engineering. It ALL interested me. I wanted to know how to take the concept from a sketch on a napkin to a packaged product on store shelves. But I had a particular interest in the process of making something tangible with my hands. So about two years into my career as a toy designer I made an effort to sculpt my first 'fantasy figure.' I used a skinny fashion doll as an armature basically, because my process is very 'hit and miss.' I'm slow. I make a lot of changes, and if I want, I can always run it through a bandsaw to tweak things and change the pose. It was also at approximately this time in my life that I realized that I am really into curvy women. I mean I have always loved Frank Frazetta's female characters. (Some of the female sprinters on the University track team raised some eyebrows too.)
But it was a chance encounter with a certain adult magazine, featuring women of 'color' that really opened my eyes. It was then that I discovered that I was one of the, perhaps not mainstream, but nonetheless very enthusiastic admirers of thick women. So once I had completed that first sculpt, I started selling them as resin model kits on eBay. Then I showed them at group art shows in Southern California, where the lowbrow art scene was in full swing. All of the feedback that I got from shopping them around informed my decision to take a huge leap of faith. And since I was not married and had no children at the time, I made a quick decison to go ahead and produce 3,000 statues(!) It was then that I realized, "Oh crap! Now I need to figure out how to market and sell these!"

I would very much like to. I'd like to do a series of more collectible, 3" inch figures or even a minifigure. I recognize that the 1:6 scale, statues are getting up there in price range. And that is going to prohibit some people from 'collecting.'
4. We have seen that you also paint, convert and even dress your sculpted models. There are many different versions and cool ideas executed. How do you plan such a unique version of a piece?
Many times the process is opportunistic. I surround myself with a lot of inspiring materials. Sometimes it's literally just juxtapositioning a few elements like, "Hey, I put this together with this and made this!" So sometimes the idea comes together fast, when I have all the pieces at my finger tips. Other times however, I have a clear idea in mind and it's a struggle to come up with the 'best' solution to make your idea a reality; Sometimes you are lucky and find a store-bought item that serves your needs. Other times you just have to make it from scratch, which of course takes a huge amount of time.


5. What is your personal favourite of your work so far and why?
One of my all-time favorites will always be "Pride of the Masai". There is something about very dark African skin tones that is very exotic and beautiful to me. I took a lot of care in making that one right and you can see it right down to the sacral (butt dimples) and fair palms. I'm still impressed that I was able to get that level of bead work from a production piece.
"Pride of the Masai"

6. Where do you get your inspiration from?
Oh, these days - social media, magazines, going to the gym (believe it or not.) When I lived in SoCal (Southern California) I used to go to Venice Beach A LOT. I would rollerblade there and people watch and take pictures. Humanity is beautiful. I like architecture too. But there is nothing more beautiful than the variety of human.
7. Do you have rituals like music or something else if you are on the search for a new and unique idea?
I find that the best way to get inspired is to travel.


8. Your favourite song of all time?
Wow... Probably something Depeche Mode or Rage Against the Machine... I'm sorry I can't narrow it down to just one. I do love to listen to music though, when I work, ..or late night talk shows. I DVR them all.
9. Tell us your most crazy moment you have encountered with your work at "Booty Babe Art"?
Some women send me nude photos of themselves and it's like, "Here is what I look like naked. Now can you sculpt me?" And they will go into details about how they want their pubic region... stylized. I assume that doesn't happen to most people. I have received some pretty odd requests. But then again, the guy who first requested "giant areolas" had a good point: If a woman has giant boobs, there is a good chance that she may also have giant areolas. I don't judge :)
9. Your recommendation for someone who is interested in sculpting and wants to improve in that field?
Practice, practice, practice. It's like playing the guitar, or speaking a foreign language. You'll only get good if you dive in and do it. And furthermore, do it regularly. You will probably be able to sculpt as well as you draw. So if you have a good eye for drawing you are half way there. Then you just need to get used to the materials and the tools.


10. When and where is the next event "Booty Babe Art" is present?
Ah, thank you for asking. On November 8th and 9th I will have a booth at the 2014 Designer con, in Pasadena, CA. I like Comic-con but I actually like this convention even better, because it is specific to artists who create collectible, 3D toy / art. By that time I should have my six NEW Kickstarter funded statues delivered and in stock. And by the way, I have just launched a presale offer: FREE SHIPPING for all sales during the month of October(!)
Spencer Davis
Homepage: Booty Babe Art
Facebook: Booty Babe Art by Spencer Davis
__________________________________________________________________________
Keep on happy sculpting and painting
and may the booty spirit always be with you!
Best Wishes and thank you for your time, Spencer.
Want to read more interviews like this one?
↧
Tutorial Voting: Theseus' Mohawk and a Box!
Heyho,
time for Thursday's Tutorial Voting.
Massive Voodoo's year of the painter brings you three choices today and you can decide by dropping your vote via comment. Voting lasts until Monday and the article might drop in Tuesday or Wednesday. Check this out!
#01
Join Peter through his very interesting and huge step by step about his project called
"Theseus´ Destiny". Read about the plan, the ideas, the basework, the colour execution, conversion work, happy little accidents and how to solve them and see how this big bull came to life.
For this article vote "Minotaur" in the comments!
![]()
#02
This article is about a step by step walkthrough on a female barbarian from the range of Ilyad Games. It gives insight in Roman's thoughts on the base and the paintjob.
For this article vote "Barbarian Girl" in your comment!
![]()
#03
Some projects need their own transport box and Roman's "Last Light" is definatly one of that kind due its pure size. Find out how Roman build a truely sturdy transport box for this diorama and learn about the material and the steps you need to find and take. For this article vote "Carry Box" in your comment!
If someone is in urgent need of a carry box, check this article here for a more simple one!
For this article vote "Carry Box" in the comments!
![]()
Happy Voting!
time for Thursday's Tutorial Voting.
Massive Voodoo's year of the painter brings you three choices today and you can decide by dropping your vote via comment. Voting lasts until Monday and the article might drop in Tuesday or Wednesday. Check this out!
#01
Join Peter through his very interesting and huge step by step about his project called
"Theseus´ Destiny". Read about the plan, the ideas, the basework, the colour execution, conversion work, happy little accidents and how to solve them and see how this big bull came to life.
For this article vote "Minotaur" in the comments!

#02
This article is about a step by step walkthrough on a female barbarian from the range of Ilyad Games. It gives insight in Roman's thoughts on the base and the paintjob.
For this article vote "Barbarian Girl" in your comment!

#03
Some projects need their own transport box and Roman's "Last Light" is definatly one of that kind due its pure size. Find out how Roman build a truely sturdy transport box for this diorama and learn about the material and the steps you need to find and take. For this article vote "Carry Box" in your comment!
If someone is in urgent need of a carry box, check this article here for a more simple one!
For this article vote "Carry Box" in the comments!

Happy Voting!
↧
↧
Ready for the SMC!

Oouurrroooaaauuggghh!
as Massive Voodoo Members are making ready in this moment to travel to Eindhoven, Netherlands for this years issue of the Scale Model Challenge, the jungle stays quite silent during the weekend. We are looking forward to see many Jungle Painters there and are looking forward to see friends again and make new ones. Looks like it is going to be an epic weekend!
Here is an impression of last years beautiful show:
Also have a look on the fun we had last year during some Jungle Interviews:
Well, we are out for the fun and not available via mail or elsewhere during the weekend!
We wish everyone of you who is not able to attend a great weekend too, take some time to paint and listen to fine music and do not forget to put your vote on the actual Tutorial Voting.
Read you soon with more happy painting voodoo :)
↧
James Kelly - Burn it down
↧
Step by Step - Theseus' Destiny
Hey jungle painters,
last week's tutorial voting is over and Massive Voodoo's year of the the painter is proud to bring you the Step by Step Article about "Theseus´ Destiny".
So let's see what Peter has to tell about his work on this sculpt by Allan Carrasco.
___________________________________________________________________________
![]()
THE IDEA:
It´s always hard to start such a huge article without telling you something about the "vision" first. To be honest, Theseus´ Destiny was not a project with a long time of planning prior to it. Most of it just "happened". Back in February some good friends visited me in Reutlingen and we had a nice weekend with painting, chatting and a lot of other stupid things. While everybody was working on his own projects, I had one of PredaStore´s beautiful Predators on my desk. But somehow it was a lot of inner force needed to get on with it. As I know myself, in these situations it is best to stop the project and start something new... something with a better feeling and by this with more motivation.
I bought Allan´s Minotaur some months before, but it was hidden deep inside my desk as I was honestly quite afraid of this huge miniature and its big areas of skin. But somehow (I´m sure it was the evil wine!) I took him out and decided that I would start him right now. As some you might know I´m very interested in history (which I studied) and ancient mythology. Right from the moment I saw Allan´s sculpt for the first time (a version painted by Raffa, names "Cow of War") I was reminded of the myth of Theseus and the Minotaur. Back in February it was time to implement this myth and finish it for the Duke of Bavaria Contest which was taking place two months later.
But how to tell the story? The Minotaur has quite a static pose and it was totally useless for a diorama with an epic fight between beast and hero. So, I had the idea of showing two different scenes at the same time: Theseus wandering through the Cretean caves beneath the palace of Minos and the Minotaur (as main character and master of this realm) looking for the intruder. To solve this problem I had to create two levels: one for the cow one for the hero. My good friend Thomas aka DarkKnight had the idea of using two plinth on top of each other to create a space in which Theseus (as a 1/72 mini) could be placed. But after some discussions with all the other guys we found a better idea and I asked Manu aka CrazyWenky to help me out...
Ok, enough of the theoretically blabla... let´s get right into it!
PAINTING THE BULL:
![]()
As Manu was on his task to get me a proper plinth for the scene, I started with the Minotaur. After the usual cleaning and priming process, I decided to use my airbrush for the first tasks, work most of the huge areas with oil colors and then finish it with acrylics.
But what about the colors? Well, I told you I was quite afraid of the Minotaur before because of its huge areas of skin. But on the weekend I was sure I would paint a black bull as it would represent pure badass power. Ok, most of you would think I was crazy and perhaps I somehow was (bad, bad wine!)... but painting black is not that hard as Roman tells you in his huge article :) To get more interesting color variations onto the mini I thought about using some kind of skin color on important areas (head, belly, hands).
Let´s get right into the topic:
1) Basics
1.1: Airbrush
![]()
After I primed the Minotaur in black, I mixed black with a bit of yellowish white and carefully sketched the basic light situation. Why the yellowish white? Pure white is not the right choice if you want to highlight your colors. As it´s not a "natural" color it will make your blending appear "scientific". This might be cool if you want to highlight some kind of sci-fi surface, but for a skin it´s in my opinion misplaced. I for myself prever a mix of white and yellow to highlight any color and only use pure white for the final tiny highlights.
Following the idea of zenithal light I highlighted areas where the light would be more intense. Allan sculpted the muscles nicely, so it was not a big deal to realize where the brighter color would have to be placed. As you can see on the picture above, I also basecoated the areas on the belly, the head and the hands in a different color. For this I used my mix of black and yellowish white and added an lightly orange skincolor into it. After the first layer, I added a bit of white to highlight the areas where the light would be most intense.
After this first steps, I took a dark wash and roughly used it on the head to define the crinkles again. I also painted the eyes red to have the focal point upon the head. And yes: in the first two weeks I was still convinced to use the axes ;-)
1.2: Basic Colors
![]()
Now it was time to create a basic structure for the painting process. For this I applied the basic colors onto the leather, the wooden staff and the horns. I also started working on the face. I used different skin colors to give the "Mooh of Doom" some character. I also added some reddish layers to make the skin more interesting.
For the horns I used a wet-in-wet technique to achieve a quick sketch. For this, apply your basic color (no mixture with water!) onto the model and while it´s still wet add your brighter or darker color (also here: do not mix it with water as everything will flow like hell) on the position you want it to be. Now carefully mix both colors at their borders into each other. You will get a rough blending.
Important: the move of your brush will decide if your blending will be more darker (if your move your brush more from dark to bright) or brighter (move your brush from the brighter color to the darker). It´s quite hard to explain, but as soon as you try it, you will know what I mean :-)
2) Oils
2.1: Basic Thoughts
![]()
After the basic stuff, it was time to get started with the oil colors. They are awesome to use as it´s quite easy to achieve nice blendings on large surfaces. As the oils need some time to dry (at least 3-4 days!) I put the mini every day in a box to prevent it from being covered with dust (which is always flying around no matter how clean your flat might be!). You may laugh, but there is nothing more nerve-racking then having tiny flakes of dust upon you mini.
The picture above is right in the middle of the "oil-stage". I´m very sorry for the crappy pic from my mobile, but I somehow forgot to take proper pictures :-/ I focused for about a week only on working with the oils. It´s not because they are so complicated to use, but the huge areas needed their time. To prevent myself from working everywhere at the same time, I structured the mini in six parts: right and left leg + torso, right and left arm, the back and finally the neck. Every evening I finished a part and believe me, it helped a lot. Finishing a stage and see your mini developing slowly is a big motivation.
For the skin I used a very simple palette of oil colors: black and a yellowish white for the black skin. It´s all you need as the oils will make a nice blending. For the brighter areas on the hands and the belly I used a skin color and the yellowish white. Interesting effect: as I mixed the yellowish white into the black, the blue particles in the black (it´s usually nothing more than a very dark blue!) got more intense and the Minotaue got a blueish and bit greenish taint. Nice!
2.2) A Tale of Varnishes
![]()
Well.... I fucked it up... As you can see on the picture the oil colors basically worked out fine and I had some nice blendings everywhere. It was time to switch to acrylics in order to get on with the job (cleaning, color variation, highlights, etc.). So, I put the Minotaur into the oven to speed up the drying process. As some of you might now I had an epic accident some years back, when I used oils for the last time. This time it would be different. I had a proper oven and was sitting in front of it for the whole time to prevent any "Peter-Events".
The drying in the oven went nice and I was happy to prepare the airbrush with Vallejo Matt Varnish so I could continue with acrylics. I usually do this as the surface is very slippery after using oils and the vanish roughs it again. But here the disaster happened: after drying the varnish covered the whole mini with a soft white layer and even "cracked up"... everything seemed ruined... my mood was terrible...
Luckily I visited Roman and Raffa the next day in their studio and Raffa had an idea: he advised me to cover the Minotaur with many layers of gloss varnish (!). Raffa explained it like this: the Vallejo Matt Vanish contains tiny white particles which usually don´t bother, but as I had a black surface it turned out grey. Now we would use a gloss varnish from Mig Jimenez , which does not contain any white pigments. The gloss varnish´s particles would fill up the "tiny gaps of the matt varnish´s surface" and cover the white particles of the Vallejo varnish. After the process, we would use a matt varnish of the same brand to matten the glossy surface. Sounds strange but it really, really worked :-)
![]()
After the varnish-process and with already removed axes (I will tell you about them later):
![]()
3) Acrylics
3.1 Basic Thoughts and Lightsituation
![]()
![]()
After the shock I was motivated to continue the "Mooh of Doom". As you can see on the pictures, I focused on intensiving the contrast on the black skin and added some color variation on the belly, the hands and the face.
The contrast on the black skin was mainly done by very careful layers of pure black for the shades and mixes with yellowish white for the highlights. Where the yellow and blue pigments of the black caused a too intense greenish (yellow + blue = green) result in the highlights, I used soft glazes of grey to counter it. Increasing contrast is one of the most important parts while painting and so it took me about two weeks to get this done properly and clean. It followed always the same rythm: adding a layer, then using glazes to soften rough blendings.
But I also want to talk about the proper play of light on such a huge miniature. As there are so many nicely sculpted shapes it is always important not to highlight them too much, even if it´s inviting to do so. Just keep the "global" lightsituation in mind. Perhaps the following sketch of my own approach can help you with this (even if it´s a crappy drawing ;-) ):
![]()
100% = pure white (tiny spots)
80% = 50/50 basic tone / bright color (don´t need to be pure white!)
60% = basic tone
30% = 50/50 basic tone / dark color (don´t need to be black!)
0% = pure black
On the top point of the head there is 100% light where between your legs there is 0% light. This is the basic thought you always have to keep in mind.
For the theory in detail I suggest to have a closer look at the following tutorials by Roman and Raffa. They are awesome and a "must-know" for every painter:
Tutorial - Zenithal Lightning / Work Order
Tutorial - Light and Shadow
3.2: Skin Variation, Horns and Leather
![]()
![]()
As you can see on the pictures above, the bull was almost finished when I took the pictures. Apart from the lightsituation I invested a lot of time in the color variation of the skin. This is what makes a miniature look interesting: the play of colors.
A look at the following pictures will explain it. They are snipes of a very early picture and one of a later stage:
![]()
![]()
As you can see on the right picture, I added some reddish colors to the skintone of the belly and the hands. This helps the skin to look more "alive" and creates an interesting focal point in this huge black/dark area. To have a nice, harmonic transfer from the bright, reddish skin to the black one, I used glazes of dark purple. The choice of purple here was simple: To simulate a "natural" transfer of two different colors, you needed a mixture of both. As I already told you, the black color contains a huge amount of blue pigments. If we mix blue and red, we will get our purple.
In my opinion the dark purple worked perfectly and created a nice, natural looking transfer between both areas.
Roman wrote a nice tutorial about color variations for skin: Tutorial - Painting Orc Skin
Let my add two additional thoughts about the horns and the leather:
If you remember one of the first pictures above, I started the horns with a brownish basic color and painted it black/dark grey during the painting process. To be honest I was not sure in which color I should paint them. So, I decided to use a simple dark/bright blending from black to nearly white. To make it appear more interesting I used dark brownish glazes in the midtones. The bright area in the middle would also support the most important focal point of the bull: his face. So, I combined a simple fact: usually red and bright areas attract our eyes the most. By using reddish glazes in the face, strong highlights and a bright spot on top of his head I maximised this effect.
For the leather I chose a darker appearance. As you can see on the last two pictures I started with a quite "bright" brown and darkened it during the painting process with inks and blue/dark glazes.
Roman also wrote a nice tutorial about leather, which helps you understand all necessary facts about this material and how to paint it properly: Tutorial - How to paint leather.
3.3 Weapons
Allan armed his version of the Minotaur with two huge battleaxes. At the beginning of the whole painting process, I was still convinced that they would support the brutal appearance of the bull, but after the first two weeks my mind changed. While painting I realized that the axes were quite a handicap for handling the bull properly. So, I simply cut them off and working on the skin was much more easy. Important lecture for myself: before putting a big miniature together, think about the painting process and if there are parts which should be added later.
But to quote Roman: everything happens for a reason. Now I could think about how the armature would support the story. With the axes the bull appeared rather static and this was not my vision of the Minotaur. In my mind he was wandering through the labyrinth, looking for intruders. So, what about something like flails? Yeah, this would be nice... this kind of weapon would support his brutish character and by pulling the flail´s bowls behind him, I could indicate some kind of movement... perfect!
![]()
![]()
The flails were quite easy to create. I formed two irregular bowls with Miliput and added a small chain. As you can see on the left picture (an early stage) I also thought about using spikes. But as I did not like the look, I increased the size of the bowls and carved small pyramids into them (Thanks to Roman for the idea!). I also added small bands of lead foil to gain an archaic look (the idea: if I hit you with this flail you will turn into a bloody smear on the wall... I like..). To connect the chain and the axes´ shafts I sculpted a simple armature. For this I used Miliput and lead foil. The sculpting was done rather rough to indicate a primitive, but solid smith´s work . On the right picture you can see a later stage of the project. The bull and the base were nearly finished and I applied everything to check the scenery´s appearance.
Tutorial: Make your own fantasy weaponry
![]()
After priming and adding the basic color to the flail, I realized that I had to fuse the bull with the base in order to paint the weapons properly. The bull should pull the flails right through the muddy surface of the cave. By this, the momentum of movement should be obvious. This was messy thing. I first had to glue the bull to the base, then glue the flail´s bowls to their positions and only then adapt the length of the chains. To support the idea of movement, the left chain had to be tight (mirroring the left hoof, which is one step ahead of the other). After the glueing, I added the mud-effect and the ground marks made by the flails. After all this done, I was finally able to paint the weapons. It was done rather quick, as my time was running out (only a few days left until the Duke of Bavaria started). The special effects of ModelMates helped me a lot:
Mu 45/Tutorial - ModelMates - Rust Effects
Mu 47/Tutorial - ModelMates, Verdigris Effect
CREATING AND PAINTING THE BASE:
![]()
1) Idea
As I already told you, in my imagination the Minotaur´s labyrinth is some kind of dark cave beneath the palace of Crete. So, I thought to combine the rough atmosphere of natural rock with the architecual influence of mankind. To include two scenes of the same epic story on a rather small plinth, I decided to work with two different scale. The "main scene" with the bull would be in 54mm scale while the "secondary scene" with Theseus on his quest would be in 1/72. To connect both scenes I would use small details like mud, stalagmites and stalactites, a shield, a skull and braziers.
2) Building and Painting
2.1 The Plinth
![]()
![]()
A big thanks to Manu for creating the plinth for me. On the left picture you can see how he implemented my ideas of the cave. The hole was 3cm wide, about 5cm high and 4cm deep. It was the perfect preparation for the later cave.
As a first step I build the column. I used cork for the basic structure and covered it with miliput. I made the column about 1cm higher than the Minotaur to create a framework for the scene and placed it on the left side. To place the higher frame on the left side was motivated by the natural way of how people in western countries read a book. You start on the top of the left side and continue down to the bottom of the right side of a page. I wanted to use this effect and help the viewer to "read" the scenery. Additonally to the column I created a basic rocky surface with miliput (combining nature and architecture).
If you are interested in learning how to create a nice base I can only recommend joining one of Roman´s Basing Classes.
2.2 The Cave
Well, the plinth already had a nice basic hole. But how to create the illusion of depth? Raffa had a nice idea: place an additional wall in front of the back-wall and leave a small gap. By this, you trick the viewer´s eye and achieve the idea of a deep cave. The following sketch will explain it better:
![]()
The following steps were simple: at first I used my Dremel to widen the hole and achieve a more natural appearance. Then, I sculpted the rocky surface with Miliput. To form the columns I used columnparts made of gypsum as a basis and covered them with Miliput. Some of you might ask why did I do this? Well, as I did some research, I discovered that in the Cretean culture round columns with a flat surface, possibly painted in red, dominated the architecture (Luke, thanks a lot for your help!). In my vision the Cretean builders sculptured the columns out of the blank rock and copied the style they used for their palaces.
![]()
![]()
But here we have an old, wet cave. To support this idea, I did some experiments to find a good way of creating stalagmites and stalactites. I placed them in both scenes in order to connect the "lower cave" and the "upper cave".
![]()
![]()
2.3 Painting
![]()
![]()
Before I painted the base, I took care of small Theseus. I used one of the Spartan Warrios of the 1/72 Zvezda range. They are nicely sculpted and it took me only two hours to paint him. My idea was to use a rather simple scheme, but nevertheless outstanding and in contrast to the bull. So my choice fell on red, gold and white.
Before painting the cave itself, I did a quick research and found the following examples:
Inspiration 1
Inspiration 2
The painting was an easy task. I used a wet in wet technique and combined brownish tones, blues and greens. To support the idea of a cave, the lower parts of the cave were painted brighter than the areas near the ceiling. The wet appearance of the cave was achieved by some layers of gloss vanish.
3) Details
3.1 Shield & Skull
![]()
![]()
The first details to connect both scenes and to make the different scales of the same story obvious were to be prepared. I decided to place a shield and a skull of a former "wanna-be-hero" beside the bull. Both were in 54mm scale (right picture with a comparison). To make it clear that the former hero was killed by the Minotaur I designed the shield´s damage fitting to the form of the flails: same size, small triangles (from the pyramidical shape of the bowls) and a huge crack done by the impact. Outsch...
The shield was painted in green to have a subtle contrast to the bull and the base. I also added a simple freehand. I did not invest too much time, as I would cover it with mud and dirt later.
Tutorial - Painting a freehand for the gaming table
Tutorial - Advanced Freehand Painting
3.2 Mud
Now it was time to complete the whole project. The bull was nearly finished, the base and the shield placed on the base. I needed a second element beside the stalagmites and stalactites to connect both scenes on a macro level (the shield and the skull were on the micro level). Wet mud was a logical choice. But how to do this? To find the best solution I made a quick experiment with gloss vanish and matt varnish.
First I mixed brown pigments with a bit of dark brown color and added the varnishes. Then, I applied the mixtures on small parts of plastic card. As the mixtures were too liquid I added some dry earth later:
![]()
![]()
I was not satisfied with the results and made a third experiment with Acrylic Soft Gel (already used for the stalagmites and stalactites). By using this material I received a nice combination: it was voluminous I could form nice soft shapes:
![]()
Finally satisfied, I covered the cave´s ground and the surface of the upper scene with the mixture. I "carefully" covered the bull´s hooves and the shield with the mixture in order to fuse the different elements with each other. After drying, the muddy parts were covered with layers of gloss varnish to intensive the wet effect. Final dirt-effects were done with brown pigments.
3.3 Braziers
I was quite satisfied with the appearance of the whole scenery. But something was missing... I missed details. As I thought about it and had a look at some pictures of dungeons and temples I realized what it was: braziers! They would provide a simple, but nice detail and ensure two points: an additional connection of both scenes and the increase the human influence on the cave.
The braziers were done very simple:
![]()
![]()
![]()
For the smaller cups I took little pieces of lead foil and placed the above a hemisphere drilled into a piece of wood. Then, I used the end of a big brush to carefully push the foil into the hemisphere. I cut the overlaying part and got a nice cup. The holding was made of small wire which was bend over the brush´s back (to get a nice circle).
The bigger cup was done the same way: I took a larger part of lead foil and looked for something with a round surface. The pots of the old Citadel Colors are perfect for this. I placed the foil on the pots and used the back of the big brush again. I carefully pushed the foil into shape. Nice side effect: by using the rather small end of the brush the surface of the cup got quite rough and it looked like it was done with a hammer.
Unfortunately I have no work in progress pictures of how I did the flames in the large cup. Time was running out and the next morning I had to leave for Augsburg. So, I have to explain it:
First, I glued small parts of stone into the cup to simulate the charcoals. Then, I used warm Green Stuff (!) for the flames: I made tiny balls and placed them where I would like the flames to be. I took tweezers with a tiny tip and pushed the balls between the small stones. Now comes the important part: I wet the tips of the tweezers, carefully take the Green Stuff and pull it upwards. The Green Stuff must be very flexible. Now it´s a question of skill and patience: form the flames like you prefer, but be aware that the Green Stuff will often be lifted from the stones. In this case, carefully push it back in place and be more careful with the tweezers ;-)
Painting was quite easy: create a blending from bright (in the charcoals) to dark. I suggest to use Raffa´s glowing pigments to get a insense, glowing fire effect.
FINAL RESULT:
![]()
More pictures here: Putty and Paint
CLOSING WORDS:
Puh, what a huge amount of text. I hope you enjoyed this step by step article as much as I did, when I wrote it down. It was interesting to get back into my memories and try to explain every step en detail. I hope all points got clear.
Theseus´ Destiny was my largest project until today and I´m happy I could finish it in time for the Duke of Bavaria. Looking back to the days when I was working on the project I realize I learnt some important lessons:
If there are some points, which are not clear, please feel free to comment below and I will add an explanation into the step by step.
If you´d like to get in touch with me, feel free to contact me: baphomet[at]massivevoodoo[dot]com
Cheers,
Peter
last week's tutorial voting is over and Massive Voodoo's year of the the painter is proud to bring you the Step by Step Article about "Theseus´ Destiny".
So let's see what Peter has to tell about his work on this sculpt by Allan Carrasco.
___________________________________________________________________________
THE IDEA:
It´s always hard to start such a huge article without telling you something about the "vision" first. To be honest, Theseus´ Destiny was not a project with a long time of planning prior to it. Most of it just "happened". Back in February some good friends visited me in Reutlingen and we had a nice weekend with painting, chatting and a lot of other stupid things. While everybody was working on his own projects, I had one of PredaStore´s beautiful Predators on my desk. But somehow it was a lot of inner force needed to get on with it. As I know myself, in these situations it is best to stop the project and start something new... something with a better feeling and by this with more motivation.
I bought Allan´s Minotaur some months before, but it was hidden deep inside my desk as I was honestly quite afraid of this huge miniature and its big areas of skin. But somehow (I´m sure it was the evil wine!) I took him out and decided that I would start him right now. As some you might know I´m very interested in history (which I studied) and ancient mythology. Right from the moment I saw Allan´s sculpt for the first time (a version painted by Raffa, names "Cow of War") I was reminded of the myth of Theseus and the Minotaur. Back in February it was time to implement this myth and finish it for the Duke of Bavaria Contest which was taking place two months later.
But how to tell the story? The Minotaur has quite a static pose and it was totally useless for a diorama with an epic fight between beast and hero. So, I had the idea of showing two different scenes at the same time: Theseus wandering through the Cretean caves beneath the palace of Minos and the Minotaur (as main character and master of this realm) looking for the intruder. To solve this problem I had to create two levels: one for the cow one for the hero. My good friend Thomas aka DarkKnight had the idea of using two plinth on top of each other to create a space in which Theseus (as a 1/72 mini) could be placed. But after some discussions with all the other guys we found a better idea and I asked Manu aka CrazyWenky to help me out...
Ok, enough of the theoretically blabla... let´s get right into it!
PAINTING THE BULL:

As Manu was on his task to get me a proper plinth for the scene, I started with the Minotaur. After the usual cleaning and priming process, I decided to use my airbrush for the first tasks, work most of the huge areas with oil colors and then finish it with acrylics.
But what about the colors? Well, I told you I was quite afraid of the Minotaur before because of its huge areas of skin. But on the weekend I was sure I would paint a black bull as it would represent pure badass power. Ok, most of you would think I was crazy and perhaps I somehow was (bad, bad wine!)... but painting black is not that hard as Roman tells you in his huge article :) To get more interesting color variations onto the mini I thought about using some kind of skin color on important areas (head, belly, hands).
Let´s get right into the topic:
1) Basics
1.1: Airbrush

After I primed the Minotaur in black, I mixed black with a bit of yellowish white and carefully sketched the basic light situation. Why the yellowish white? Pure white is not the right choice if you want to highlight your colors. As it´s not a "natural" color it will make your blending appear "scientific". This might be cool if you want to highlight some kind of sci-fi surface, but for a skin it´s in my opinion misplaced. I for myself prever a mix of white and yellow to highlight any color and only use pure white for the final tiny highlights.
Following the idea of zenithal light I highlighted areas where the light would be more intense. Allan sculpted the muscles nicely, so it was not a big deal to realize where the brighter color would have to be placed. As you can see on the picture above, I also basecoated the areas on the belly, the head and the hands in a different color. For this I used my mix of black and yellowish white and added an lightly orange skincolor into it. After the first layer, I added a bit of white to highlight the areas where the light would be most intense.
After this first steps, I took a dark wash and roughly used it on the head to define the crinkles again. I also painted the eyes red to have the focal point upon the head. And yes: in the first two weeks I was still convinced to use the axes ;-)
1.2: Basic Colors

Now it was time to create a basic structure for the painting process. For this I applied the basic colors onto the leather, the wooden staff and the horns. I also started working on the face. I used different skin colors to give the "Mooh of Doom" some character. I also added some reddish layers to make the skin more interesting.
For the horns I used a wet-in-wet technique to achieve a quick sketch. For this, apply your basic color (no mixture with water!) onto the model and while it´s still wet add your brighter or darker color (also here: do not mix it with water as everything will flow like hell) on the position you want it to be. Now carefully mix both colors at their borders into each other. You will get a rough blending.
Important: the move of your brush will decide if your blending will be more darker (if your move your brush more from dark to bright) or brighter (move your brush from the brighter color to the darker). It´s quite hard to explain, but as soon as you try it, you will know what I mean :-)
2) Oils
2.1: Basic Thoughts

After the basic stuff, it was time to get started with the oil colors. They are awesome to use as it´s quite easy to achieve nice blendings on large surfaces. As the oils need some time to dry (at least 3-4 days!) I put the mini every day in a box to prevent it from being covered with dust (which is always flying around no matter how clean your flat might be!). You may laugh, but there is nothing more nerve-racking then having tiny flakes of dust upon you mini.
The picture above is right in the middle of the "oil-stage". I´m very sorry for the crappy pic from my mobile, but I somehow forgot to take proper pictures :-/ I focused for about a week only on working with the oils. It´s not because they are so complicated to use, but the huge areas needed their time. To prevent myself from working everywhere at the same time, I structured the mini in six parts: right and left leg + torso, right and left arm, the back and finally the neck. Every evening I finished a part and believe me, it helped a lot. Finishing a stage and see your mini developing slowly is a big motivation.
For the skin I used a very simple palette of oil colors: black and a yellowish white for the black skin. It´s all you need as the oils will make a nice blending. For the brighter areas on the hands and the belly I used a skin color and the yellowish white. Interesting effect: as I mixed the yellowish white into the black, the blue particles in the black (it´s usually nothing more than a very dark blue!) got more intense and the Minotaue got a blueish and bit greenish taint. Nice!
2.2) A Tale of Varnishes

Well.... I fucked it up... As you can see on the picture the oil colors basically worked out fine and I had some nice blendings everywhere. It was time to switch to acrylics in order to get on with the job (cleaning, color variation, highlights, etc.). So, I put the Minotaur into the oven to speed up the drying process. As some of you might now I had an epic accident some years back, when I used oils for the last time. This time it would be different. I had a proper oven and was sitting in front of it for the whole time to prevent any "Peter-Events".
The drying in the oven went nice and I was happy to prepare the airbrush with Vallejo Matt Varnish so I could continue with acrylics. I usually do this as the surface is very slippery after using oils and the vanish roughs it again. But here the disaster happened: after drying the varnish covered the whole mini with a soft white layer and even "cracked up"... everything seemed ruined... my mood was terrible...
Luckily I visited Roman and Raffa the next day in their studio and Raffa had an idea: he advised me to cover the Minotaur with many layers of gloss varnish (!). Raffa explained it like this: the Vallejo Matt Vanish contains tiny white particles which usually don´t bother, but as I had a black surface it turned out grey. Now we would use a gloss varnish from Mig Jimenez , which does not contain any white pigments. The gloss varnish´s particles would fill up the "tiny gaps of the matt varnish´s surface" and cover the white particles of the Vallejo varnish. After the process, we would use a matt varnish of the same brand to matten the glossy surface. Sounds strange but it really, really worked :-)

After the varnish-process and with already removed axes (I will tell you about them later):

3) Acrylics
3.1 Basic Thoughts and Lightsituation


After the shock I was motivated to continue the "Mooh of Doom". As you can see on the pictures, I focused on intensiving the contrast on the black skin and added some color variation on the belly, the hands and the face.
The contrast on the black skin was mainly done by very careful layers of pure black for the shades and mixes with yellowish white for the highlights. Where the yellow and blue pigments of the black caused a too intense greenish (yellow + blue = green) result in the highlights, I used soft glazes of grey to counter it. Increasing contrast is one of the most important parts while painting and so it took me about two weeks to get this done properly and clean. It followed always the same rythm: adding a layer, then using glazes to soften rough blendings.
But I also want to talk about the proper play of light on such a huge miniature. As there are so many nicely sculpted shapes it is always important not to highlight them too much, even if it´s inviting to do so. Just keep the "global" lightsituation in mind. Perhaps the following sketch of my own approach can help you with this (even if it´s a crappy drawing ;-) ):

100% = pure white (tiny spots)
80% = 50/50 basic tone / bright color (don´t need to be pure white!)
60% = basic tone
30% = 50/50 basic tone / dark color (don´t need to be black!)
0% = pure black
On the top point of the head there is 100% light where between your legs there is 0% light. This is the basic thought you always have to keep in mind.
For the theory in detail I suggest to have a closer look at the following tutorials by Roman and Raffa. They are awesome and a "must-know" for every painter:
Tutorial - Zenithal Lightning / Work Order
Tutorial - Light and Shadow
3.2: Skin Variation, Horns and Leather


As you can see on the pictures above, the bull was almost finished when I took the pictures. Apart from the lightsituation I invested a lot of time in the color variation of the skin. This is what makes a miniature look interesting: the play of colors.
A look at the following pictures will explain it. They are snipes of a very early picture and one of a later stage:


As you can see on the right picture, I added some reddish colors to the skintone of the belly and the hands. This helps the skin to look more "alive" and creates an interesting focal point in this huge black/dark area. To have a nice, harmonic transfer from the bright, reddish skin to the black one, I used glazes of dark purple. The choice of purple here was simple: To simulate a "natural" transfer of two different colors, you needed a mixture of both. As I already told you, the black color contains a huge amount of blue pigments. If we mix blue and red, we will get our purple.
In my opinion the dark purple worked perfectly and created a nice, natural looking transfer between both areas.
Roman wrote a nice tutorial about color variations for skin: Tutorial - Painting Orc Skin
Let my add two additional thoughts about the horns and the leather:
If you remember one of the first pictures above, I started the horns with a brownish basic color and painted it black/dark grey during the painting process. To be honest I was not sure in which color I should paint them. So, I decided to use a simple dark/bright blending from black to nearly white. To make it appear more interesting I used dark brownish glazes in the midtones. The bright area in the middle would also support the most important focal point of the bull: his face. So, I combined a simple fact: usually red and bright areas attract our eyes the most. By using reddish glazes in the face, strong highlights and a bright spot on top of his head I maximised this effect.
For the leather I chose a darker appearance. As you can see on the last two pictures I started with a quite "bright" brown and darkened it during the painting process with inks and blue/dark glazes.
Roman also wrote a nice tutorial about leather, which helps you understand all necessary facts about this material and how to paint it properly: Tutorial - How to paint leather.
3.3 Weapons
Allan armed his version of the Minotaur with two huge battleaxes. At the beginning of the whole painting process, I was still convinced that they would support the brutal appearance of the bull, but after the first two weeks my mind changed. While painting I realized that the axes were quite a handicap for handling the bull properly. So, I simply cut them off and working on the skin was much more easy. Important lecture for myself: before putting a big miniature together, think about the painting process and if there are parts which should be added later.
But to quote Roman: everything happens for a reason. Now I could think about how the armature would support the story. With the axes the bull appeared rather static and this was not my vision of the Minotaur. In my mind he was wandering through the labyrinth, looking for intruders. So, what about something like flails? Yeah, this would be nice... this kind of weapon would support his brutish character and by pulling the flail´s bowls behind him, I could indicate some kind of movement... perfect!


The flails were quite easy to create. I formed two irregular bowls with Miliput and added a small chain. As you can see on the left picture (an early stage) I also thought about using spikes. But as I did not like the look, I increased the size of the bowls and carved small pyramids into them (Thanks to Roman for the idea!). I also added small bands of lead foil to gain an archaic look (the idea: if I hit you with this flail you will turn into a bloody smear on the wall... I like..). To connect the chain and the axes´ shafts I sculpted a simple armature. For this I used Miliput and lead foil. The sculpting was done rather rough to indicate a primitive, but solid smith´s work . On the right picture you can see a later stage of the project. The bull and the base were nearly finished and I applied everything to check the scenery´s appearance.
Tutorial: Make your own fantasy weaponry

After priming and adding the basic color to the flail, I realized that I had to fuse the bull with the base in order to paint the weapons properly. The bull should pull the flails right through the muddy surface of the cave. By this, the momentum of movement should be obvious. This was messy thing. I first had to glue the bull to the base, then glue the flail´s bowls to their positions and only then adapt the length of the chains. To support the idea of movement, the left chain had to be tight (mirroring the left hoof, which is one step ahead of the other). After the glueing, I added the mud-effect and the ground marks made by the flails. After all this done, I was finally able to paint the weapons. It was done rather quick, as my time was running out (only a few days left until the Duke of Bavaria started). The special effects of ModelMates helped me a lot:
Mu 45/Tutorial - ModelMates - Rust Effects
Mu 47/Tutorial - ModelMates, Verdigris Effect
CREATING AND PAINTING THE BASE:

1) Idea
As I already told you, in my imagination the Minotaur´s labyrinth is some kind of dark cave beneath the palace of Crete. So, I thought to combine the rough atmosphere of natural rock with the architecual influence of mankind. To include two scenes of the same epic story on a rather small plinth, I decided to work with two different scale. The "main scene" with the bull would be in 54mm scale while the "secondary scene" with Theseus on his quest would be in 1/72. To connect both scenes I would use small details like mud, stalagmites and stalactites, a shield, a skull and braziers.
2) Building and Painting
2.1 The Plinth


A big thanks to Manu for creating the plinth for me. On the left picture you can see how he implemented my ideas of the cave. The hole was 3cm wide, about 5cm high and 4cm deep. It was the perfect preparation for the later cave.
As a first step I build the column. I used cork for the basic structure and covered it with miliput. I made the column about 1cm higher than the Minotaur to create a framework for the scene and placed it on the left side. To place the higher frame on the left side was motivated by the natural way of how people in western countries read a book. You start on the top of the left side and continue down to the bottom of the right side of a page. I wanted to use this effect and help the viewer to "read" the scenery. Additonally to the column I created a basic rocky surface with miliput (combining nature and architecture).
If you are interested in learning how to create a nice base I can only recommend joining one of Roman´s Basing Classes.
2.2 The Cave
Well, the plinth already had a nice basic hole. But how to create the illusion of depth? Raffa had a nice idea: place an additional wall in front of the back-wall and leave a small gap. By this, you trick the viewer´s eye and achieve the idea of a deep cave. The following sketch will explain it better:

The following steps were simple: at first I used my Dremel to widen the hole and achieve a more natural appearance. Then, I sculpted the rocky surface with Miliput. To form the columns I used columnparts made of gypsum as a basis and covered them with Miliput. Some of you might ask why did I do this? Well, as I did some research, I discovered that in the Cretean culture round columns with a flat surface, possibly painted in red, dominated the architecture (Luke, thanks a lot for your help!). In my vision the Cretean builders sculptured the columns out of the blank rock and copied the style they used for their palaces.


But here we have an old, wet cave. To support this idea, I did some experiments to find a good way of creating stalagmites and stalactites. I placed them in both scenes in order to connect the "lower cave" and the "upper cave".


2.3 Painting


Before I painted the base, I took care of small Theseus. I used one of the Spartan Warrios of the 1/72 Zvezda range. They are nicely sculpted and it took me only two hours to paint him. My idea was to use a rather simple scheme, but nevertheless outstanding and in contrast to the bull. So my choice fell on red, gold and white.
Before painting the cave itself, I did a quick research and found the following examples:
Inspiration 1
Inspiration 2
The painting was an easy task. I used a wet in wet technique and combined brownish tones, blues and greens. To support the idea of a cave, the lower parts of the cave were painted brighter than the areas near the ceiling. The wet appearance of the cave was achieved by some layers of gloss vanish.
3) Details
3.1 Shield & Skull


The first details to connect both scenes and to make the different scales of the same story obvious were to be prepared. I decided to place a shield and a skull of a former "wanna-be-hero" beside the bull. Both were in 54mm scale (right picture with a comparison). To make it clear that the former hero was killed by the Minotaur I designed the shield´s damage fitting to the form of the flails: same size, small triangles (from the pyramidical shape of the bowls) and a huge crack done by the impact. Outsch...
The shield was painted in green to have a subtle contrast to the bull and the base. I also added a simple freehand. I did not invest too much time, as I would cover it with mud and dirt later.
Tutorial - Painting a freehand for the gaming table
Tutorial - Advanced Freehand Painting
3.2 Mud
Now it was time to complete the whole project. The bull was nearly finished, the base and the shield placed on the base. I needed a second element beside the stalagmites and stalactites to connect both scenes on a macro level (the shield and the skull were on the micro level). Wet mud was a logical choice. But how to do this? To find the best solution I made a quick experiment with gloss vanish and matt varnish.
First I mixed brown pigments with a bit of dark brown color and added the varnishes. Then, I applied the mixtures on small parts of plastic card. As the mixtures were too liquid I added some dry earth later:


I was not satisfied with the results and made a third experiment with Acrylic Soft Gel (already used for the stalagmites and stalactites). By using this material I received a nice combination: it was voluminous I could form nice soft shapes:

Finally satisfied, I covered the cave´s ground and the surface of the upper scene with the mixture. I "carefully" covered the bull´s hooves and the shield with the mixture in order to fuse the different elements with each other. After drying, the muddy parts were covered with layers of gloss varnish to intensive the wet effect. Final dirt-effects were done with brown pigments.
3.3 Braziers
I was quite satisfied with the appearance of the whole scenery. But something was missing... I missed details. As I thought about it and had a look at some pictures of dungeons and temples I realized what it was: braziers! They would provide a simple, but nice detail and ensure two points: an additional connection of both scenes and the increase the human influence on the cave.
The braziers were done very simple:


For the smaller cups I took little pieces of lead foil and placed the above a hemisphere drilled into a piece of wood. Then, I used the end of a big brush to carefully push the foil into the hemisphere. I cut the overlaying part and got a nice cup. The holding was made of small wire which was bend over the brush´s back (to get a nice circle).
The bigger cup was done the same way: I took a larger part of lead foil and looked for something with a round surface. The pots of the old Citadel Colors are perfect for this. I placed the foil on the pots and used the back of the big brush again. I carefully pushed the foil into shape. Nice side effect: by using the rather small end of the brush the surface of the cup got quite rough and it looked like it was done with a hammer.
Unfortunately I have no work in progress pictures of how I did the flames in the large cup. Time was running out and the next morning I had to leave for Augsburg. So, I have to explain it:
First, I glued small parts of stone into the cup to simulate the charcoals. Then, I used warm Green Stuff (!) for the flames: I made tiny balls and placed them where I would like the flames to be. I took tweezers with a tiny tip and pushed the balls between the small stones. Now comes the important part: I wet the tips of the tweezers, carefully take the Green Stuff and pull it upwards. The Green Stuff must be very flexible. Now it´s a question of skill and patience: form the flames like you prefer, but be aware that the Green Stuff will often be lifted from the stones. In this case, carefully push it back in place and be more careful with the tweezers ;-)
Painting was quite easy: create a blending from bright (in the charcoals) to dark. I suggest to use Raffa´s glowing pigments to get a insense, glowing fire effect.
FINAL RESULT:

More pictures here: Putty and Paint
CLOSING WORDS:
Puh, what a huge amount of text. I hope you enjoyed this step by step article as much as I did, when I wrote it down. It was interesting to get back into my memories and try to explain every step en detail. I hope all points got clear.
Theseus´ Destiny was my largest project until today and I´m happy I could finish it in time for the Duke of Bavaria. Looking back to the days when I was working on the project I realize I learnt some important lessons:
- Take your time!
- Preparation is important, but you can never be prepared for everything. So, in case of mistakes, relax, take a cup of coffee/tea and think about a solution.
- If you work on a large project, split it up into smaller steps.You can handle smaller projects easily and by this, you can handle big ones, too.
If there are some points, which are not clear, please feel free to comment below and I will add an explanation into the step by step.
If you´d like to get in touch with me, feel free to contact me: baphomet[at]massivevoodoo[dot]com
Cheers,
Peter
↧
SMC Special Figure
"After the Scale Model Challenge is before the Scale Model Challenge."
Well, that is what the socket label of one of Roman's latest miniatures says.
We returned home monday evening from the great event that was Scale Model Challenge 2014 in Veldhoven, Netherlands. We were pretty exhausted and tired and took the whole Tuesday off, but do not get us wrong here, it was a beautiful and cool time we spent on and before and after the show. It was great to meet many painter friends there and also make new ones. There will be a bigger review about the SMC on Massive Voodoo sooner or later as many photos have to be prepared and we do not hurry in such cases.
Well, this post is about a model that was prepared and painted before the SMC took part to say thanks to Robert Crombeecke, the main organisator behind the show who really helps Massive Voodoo to be at the SMC since three years now.
SMC serious selfie with Robert and Roman

Allright. Now to the model. Roman took a historical figure from Alpine Miniatures and placed him in the moment after the show, when every trader, every club, every painter and every visitor left the halls.Dirty floors and even some "Lost&Found" Miniatures and military vehicles.It might give the military figure a complete different look, but it was a lot of fun.Massive Voodoo was truely happy to give this gift to Robert.Let's have a look then:
"After the Scale Model Challenge is before the Scale Model Challenge."
Alpine Miniatures, Scratch-base, 1:35
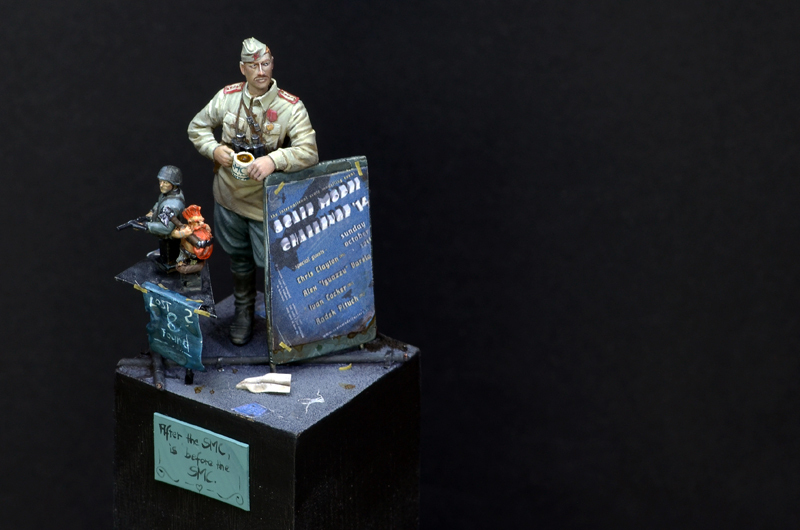
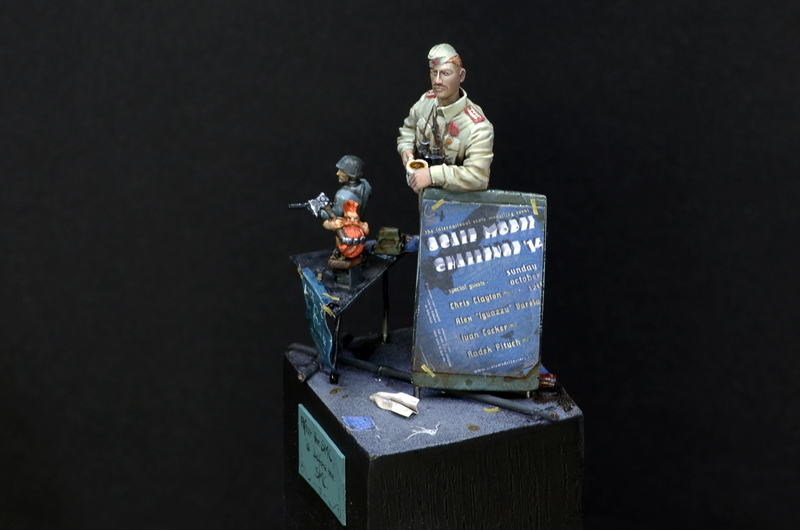
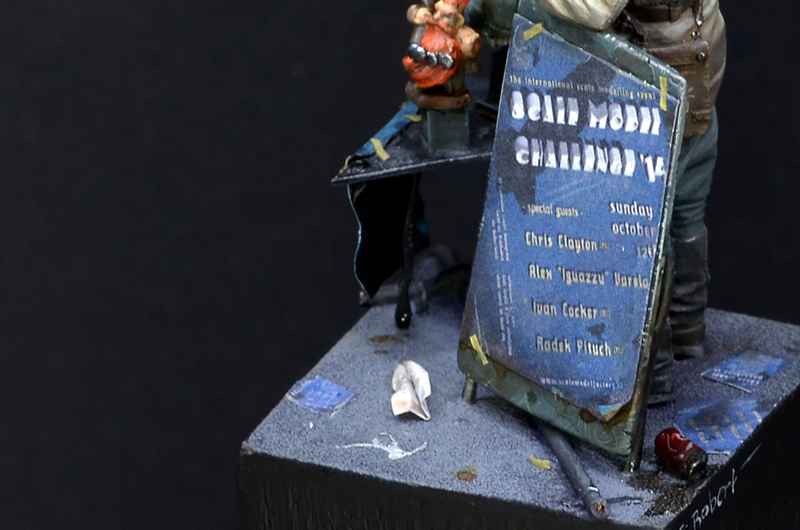
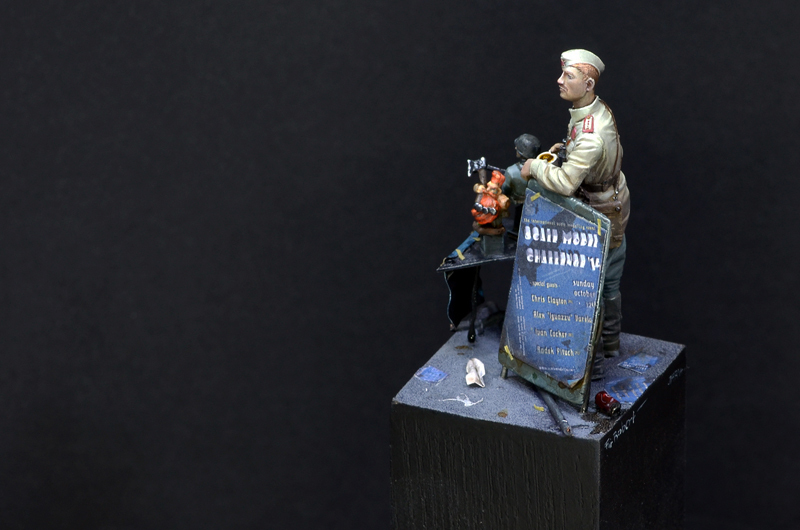

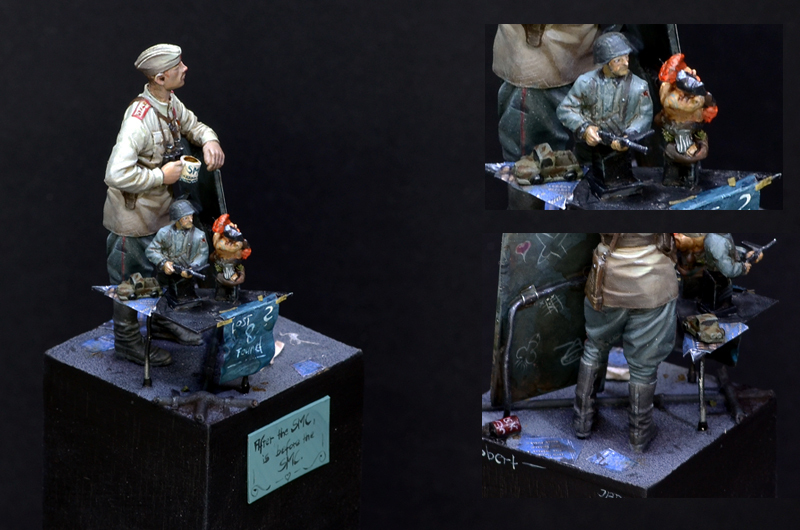
Many useful things have been executed here so no need to wonder that there will be a full step by step of this piece ready in the future.
We hope you like him!
Let us know your thoughts and keep on happy painting!
↧
↧
MV's Bananalicious Update!

MV's BANANALICIOUS CONTEST - ISSUE 2 will start on November 17th 2014 and until then we want you to know that you have to prepare yourself. We will provide you with all information you need and have some cool updates of the rules and categories. We are sure that this issue will shake the painting community to its core when all of us line up to top the number of 172 entries of the first issue.
So far we want to thank the following sponsors,
who already are supporting the Bananalicious II:
MProyec
The Bent Bristle
Battlefield-Berlin
Sockelmacher
Painting-Buddha
Big Panda V
Troll Forged Miniatures
Morland Studios
Putty&Paint
Broken Toad
Mr Lee Painting Emporium
Wonderlands Project
Secret Weapon Miniatures
Kaha Miniatures
You want to be a sponsor too?
You own a miniature company, a painter's forum, a miniature related blog or you are a single individual and you want to be a sponsor of the BANANALICIOUS CONTEST - ISSUE 2?
If so, please contact us via: mv---at---massivevoodoo---dot---com
to recieve all important information.
Read more about MV's huge online contest soon!
↧
Tutorial Voting: A funky Robot that loves to paint frogs!
Good Morning Jungle Painters,
Thursday is Tutorial Voting day and Massive Voodoo's year of the painter is proud to present you the following choices today. You decide which article will be up next week via putting your vote into the comments. Ready? These your choices today:
#1
In this article guest author and jungle friend, Matt Di Pietro takes you on a step by step journey through his Forged Hope project "Arthur". His robot placed second in the overall Forged Hope Program and it is really a joy to see the thoughts and plans behind this Robot, who loves to paint.
For this article vote "Arthur" in the comments!
![]()
#02
See Roman tackling his second conversion of Forged Monkey's Jamal bust, called "Funkmaster J".
A little bit of sculpting, chains and glitter in the end. Funky, eh?
For this article vote "Funk" in the comments!
![]()
#03
This article goes back to the explanation on how Roman painted the Toadking in his project called
"Frogs X-ing". It is a deep look into the paintjob itself, no basing or other talk included.
For this article vote "Green Frog" in your comment!
![]()
Now it is your turn!
Vote your favourite!
Thursday is Tutorial Voting day and Massive Voodoo's year of the painter is proud to present you the following choices today. You decide which article will be up next week via putting your vote into the comments. Ready? These your choices today:
#1
In this article guest author and jungle friend, Matt Di Pietro takes you on a step by step journey through his Forged Hope project "Arthur". His robot placed second in the overall Forged Hope Program and it is really a joy to see the thoughts and plans behind this Robot, who loves to paint.
For this article vote "Arthur" in the comments!

#02
See Roman tackling his second conversion of Forged Monkey's Jamal bust, called "Funkmaster J".
A little bit of sculpting, chains and glitter in the end. Funky, eh?
For this article vote "Funk" in the comments!

#03
This article goes back to the explanation on how Roman painted the Toadking in his project called
"Frogs X-ing". It is a deep look into the paintjob itself, no basing or other talk included.
For this article vote "Green Frog" in your comment!

Now it is your turn!
Vote your favourite!
↧
SMC review preview!
Hey!
The jungle report on this years issue of the Scale Model Challenge is arriving with big steps - here is a little preview:
![]()
![]()
![]()
![]()
![]()
![]()
The jungle report on this years issue of the Scale Model Challenge is arriving with big steps - here is a little preview:


↧
Mu 61 - Guild Ball - Boiler, 28 mm

Hello Jungle Painters,
today Massive Voodoo brings you another Miniatures Unpacked.
This time we will take a closer look on a miniature from the game Guild Ball, which was funded by its past succesful Kickstarter.
From the first looks a game that takes different teams, which are made up from different guilds on a field to play football against eachother. The game is run with 32 mm sized models and has a lot of cool characters in it. This is what their Homepage says about the background of the game:
"Guild Ball takes place in a land now known as the Empire of Free Cities; it’s essentially a pseudo-historical setting with strong European flavours. The lands of the empire are made up of a huge variety of climates, cultures and landscapes each controlled by a sovereign City.
Mob football is a game generally played between neighbouring towns and villages on feast days (hence the popularity). The game was originally played in the middle of towns and villages where the objective was to take the ball to the opposing side of town. But to prevent the inevitable collateral damage it rapidly evolved into being played in the surrounding countryside, often in a special field set aside for the purpose. At its core, players on opposing teams, clash and struggle to control leather wrapped inflated pig's bladder and attempt to kick it into the opponent’s goal. Over the years, rudimentary leagues and tournaments have sprung up, there have even been some national level games between city states.
The Guilds have taken advantage of the huge popularity of the sport and have invested vast sums of money, creating professional teams and structured leagues. The public went crazy as the game was elevated to new heights of spectacle. Guild Ball was born amidst a blaze of interest and publicity and with it, a whole new business and revenue stream for the Guilds. Games are now played out in front of vast crowds of fans, whilst behind the scenes the results can mean fortunes are won or lost on the kick of a ball."
The Miniature we will have a look on comes from the Butcher's Guild and is called "Boiler".
Following you can see an Artwork of the full Butcher's guild; photo taken from store.guildball.com:

Boiler is the little guy to the left.
Let's see how the model arrives - Honestly from the first impression we did not really understand what is going on there. Five white metals part allright, but how does the model look like when ready?

Having a closer look on the parts it was clear that they need a little cleaning but it is not bad. Some work with some blades and fine sanding paper and some simple mould lines and casting remains are gone.


Well, after the cleaning process it was glueing time and the parts do fit perfectly here.
A true pleasure to find such well prepared spots to glue. It appeared that "Boiler" seems to be a truely fast pacing character when it comes to mob football. Really a very dynamix pose, ready to strike fast.


Boiler finds himself already under Roman's brush and is truely a cool Miniature to paint. Still an early WIP but definatly fun.

Well, we can only recommend to keep your eyes to Guild Ball.
This surely is becoming one of the Skirmish Games with really cool models! Check their homepage to find out more about how the game is played, how to get started and about those many cool guilds.
Keep on happy painting!
↧
↧
Ultimate Paint Rack Pre-order Reminder!
Hello Jungle Painters,
![]()
while the production of the Ultimate Paint Racks and all the parts from our Indigogo Campaign runs smoothly in the background we are recieving many questions from those who have missed the campaign. Questions like: "Is it available for sale later on!" or "Where can I buy one?" ...
Well, in case you have missed the information: You can already pre-order yours!
↧
Step by Step: Arthur, by Matt Di Pietro

Good Morning Jungle Painters,
time again to bring you your choice from last weeks tutorial Voting.
Today Massive Voodoo's year of the painter is very proud to bring you an article written by a guest author.
The guest author this time is nobody else than Matt Di Pietro.
Some of you might know him as the house painter of Privateer Press. His paintwork is truely beautiful and his ideas are fresh and innovative. It is always a pleasure to see a miniature project by Matt as he comes up with soulful ideas. Matt made it up to the second place of our Forged Hope Program with his Robot "Arthur".
Massive Voodoo is thankful that Matt found the time and made the effort to write a step by step about his plans and the execution for this project. A very cool read that we can only recommend, true happy painting spirit in every word!
Now let Matt speak for himself!
We hope you'll enjoy the read!
________________________________________________________________________
Hello to all the readers of Massive Voodoo!
1) My name is Matt DiPietro and I live in Seattle, USA, a city nestled amongst lush forests, magnificent beaches, and towering mountains. Building and painting miniatures is my passion and it is something I’ve been doing for over 19 years now! You may have seen some of my work for Privateer Press (Warmachine, Hordes) that I have painted during my 8 years as their head studio miniature painter.
%2BArthur%2BWIP.jpg)
Even though painting is my career, I make sure to clear time for painting display models. It is during these times that I work with no rules and truly I find my happiest painting. I am very excited for the opportunity to share my thoughts and process with you!
2) I like to start by sketching my idea. I use the outlines of some potential bases to setthe proper
scale for my drawings. This is very helpful for working out spacing and composition. My sketches are just rough ideas which are refined throughout the rest of the process.
%2BArthur%2BWIP.jpg)
%2BArthur%2BWIP.jpg)
3) With such a poseable kit, the base needed to be started before assembling the robot. An ancient and broken road will be the backdrop...beaten by rains, the earth turned to mud, fractured in the baking sun.
%2BArthur%2BWIP.jpg)
%2BArthur%2BWIP.jpg)
%2BArthur%2BWIP.jpg)
4) The RK1 robot kit has many options. I chose to stay close to human in design because I wanted my
audience to easily relate to him. Also, art is a very human trait and I felt my robot should reflect this. I imagined him living in a post-human world where humanity has attempted to preserve their minds from the ravages of a dying world.
%2BArthur%2BWIP.jpg)
5) Since I wanted to convey complex mood and emotion, I knew that the correct posing of the hands
would be critical. So I had my wife take photos for me to use as reference for the hands.
%2BArthur%2BWIP.jpg)
%2BArthur%2BWIP.jpg)
6) The following order of operations was vital to getting the hands posed correctly! Referencing the photos, I formed the fingers to the general shape using a little heat from my hair dryer (a pair of locking tweezers is a very valuable tool!). Then, I attached the hand to the face with small amounts of super glue. Only then was the arm pose set.
%2BArthur%2BWIP.jpg)
%2BArthur%2BWIP.jpg)
%2BArthur%2BWIP.jpg)
7) I used several thicknesses of plastic rod for this piece. It's a cheap and useful material to have on-
hand as the properties are quite different from metal wire (which you will see in the next few steps).
This length of 0.8mm plastic rod was gripped in my pin vice and shaped with diamond files into...
%2BArthur%2BWIP.jpg)
%2BArthur%2BWIP.jpg)
8) The smallest paint brush in my collection!
%2BArthur%2BWIP.jpg)
9) Referencing the photos, I glued the brush into its place, resting against the robot’s pointer finger.
%2BArthur%2BWIP.jpg)
Then I used a hair dryer again to form the fingers into position around the brush.
%2BArthur%2BWIP.jpg)
10) The joint between the robotic arm and the easel is made up of the easel backing, a spacer, and two sides with depressions that I createdusing a small drill. With the parts assembled, the joint hung
freely and the painting easel could be removed from/re-attached to the robot arm throughout the
painting process.
%2BArthur%2BWIP.jpg)
%2BArthur%2BWIP.jpg)
11) The pose for the robotic arm was worked out one joint at a time through careful dry fitting.
%2BArthur%2BWIP.jpg)
12) The modifications of the palette into a robotic paint dispenser and palette begin! Plastic rod was used instead of metal wire. This plastic finds its own shape, yielding a result that is (in this case) more natural and durable.
%2BArthur%2BWIP.jpg)
13) To attach the plastic rods, first glue them at one end. Then bend and dry fit to measure the proper length. Cut the plastic rods to length and bend it once more into the proper shape. Glue the rods at that end to fix them into position. The rods are flexible and will not easily deform or break.
%2BArthur%2BWIP.jpg)
14) The finished robotic paint palette. A dispenser runs along a track, mixing proportions of the primary colors and depositing the mixtures onto the palette. The loop in the feed lines is for added realism; the lines would need slack to allow the dispenser to move back and forth.
%2BArthur%2BWIP.jpg)
15) With all parts ready for priming and paint, my wife and I head off on an adventure to the pacific coast...
%2BArthur%2BWIP.jpg)
16) ...and inspiration finds me there...
%2BArthur%2BWIP.jpg)
%2BArthur%2BWIP.jpg)
17) Back to work with some serious Painting-Mojo coursing through my veins! The selection of basing materials used: a worn plastic bag, a strange seed pod, and some grass.
%2BArthur%2BWIP.jpg)
18) Plants are made of a collection of repeating micro structures which are perfect for simulating miniature plants. Precision scissors were used to the dissect grasses. Next, the grass pieces were then stuck to tape and affixed to a block. Then I airbrushed one side orange and the other side blue to simulate the light of sunset.
%2BArthur%2BWIP.jpg)
%2BArthur%2BWIP.jpg)
 19) The pieces were carefully dipped into a pool of CA glue and meticulously placed.
19) The pieces were carefully dipped into a pool of CA glue and meticulously placed.%2BArthur%2BWIP.jpg)
20) The plastic bag was torn and placed to suggest the lonely coastal wind. I also tried to mirror this imagined wind in the grass.
%2BArthur%2BWIP.jpg)
21) I saved the tiny painting until the end. Honestly, I had never done anything like this before. I did not know how long it would take, if I would be unable to complete the painting, or if it would be so badly done that all of my previous work would be wasted. I only had one day left to finish the painting and final assembly, so after a hearty breakfast with a big cup of powerful coffee, I attacked the project with all I had!
%2BArthur%2BWIP.jpg)
22) The painting was painted on a cigarette rolling paper. Other papers are too thick for miniatures and will be out of scale with the model. The paper was taped to a plastic block and primed with white primer. The dark lines were my planned cropping lines. It's good to be able to crop for added flexibility.
%2BArthur%2BWIP.jpg)
%2BArthur%2BWIP.jpg)
23) A smile as bright as that sunset spread across my face when I was done. Here are some pictures of the painting and palette before assembly so you can get an idea of scale. The coin pictured (US penny) is the same size as a two-cent Euro coin.
%2BArthur%2BWIP.jpg)
%2BArthur%2BWIP.jpg)
%2BArthur%2BWIP.jpg)
24) You can find pictures of the finished project at Putty & Paint.

A big thank you to Massive Voodoo for asking me to write this project log, and a special thanks to all of you for following along! I hope you find your inspiration and enjoy many hours, days, and years of happy painting.
Matt Di Pietro
%2BArthur%2BWIP.jpg)
↧
Banshee again ... part II
Do not forget to switch on the subtitles :)
↧
Tutorial Voting: Historical Zombies in a box!
Good Morning Jungle,
Massive Voodoo's year of the painter brings you another tutorial voting on this Thursday Morning.
Feel invited to vote your choice via comment. Which article should be up next week?
Voting lasts until Monday next week! These are today's options:
#01
This article will grant you inside into Roman's paintjob on the beautiful, but also ugly Zombie-bust, named "Jessica".
For this article vote"Zombie" in your comment!
![]()
#02
In this article you will see a project log of Roman's take on a 1:35 Military Model from Alpine Miniatures. See how it grew to become a special gift to the organisator of the recently held Scale Model Challenge.
For this article vote"Alpine" in your comment!
![]()
#03
Some projects need their own transport box and Roman's "Last Light" is definatly one of that kind due its pure size. Find out how Roman build a truely sturdy transport box for this diorama and learn about the material and the steps you need to find and take.
For this article vote"Carry Box" in your comment!
![]()
Now it is up to you!
Your vote counts and can make the difference!
Massive Voodoo's year of the painter brings you another tutorial voting on this Thursday Morning.
Feel invited to vote your choice via comment. Which article should be up next week?
Voting lasts until Monday next week! These are today's options:
#01
This article will grant you inside into Roman's paintjob on the beautiful, but also ugly Zombie-bust, named "Jessica".
For this article vote"Zombie" in your comment!

#02
In this article you will see a project log of Roman's take on a 1:35 Military Model from Alpine Miniatures. See how it grew to become a special gift to the organisator of the recently held Scale Model Challenge.
For this article vote"Alpine" in your comment!

#03
Some projects need their own transport box and Roman's "Last Light" is definatly one of that kind due its pure size. Find out how Roman build a truely sturdy transport box for this diorama and learn about the material and the steps you need to find and take.
For this article vote"Carry Box" in your comment!
Now it is up to you!
Your vote counts and can make the difference!
↧
↧
Painting Class in Versailles, France - free slots available
Hey guys & gals,
in January 2015 there will be one of Roman´s Beginner Classes taking place in Versailles, France. At the moment there are three slots still available. So, if you like to join the class, you just have to be quick.
The class will be in English (with French translation) and taking place on
16th until 18th of January 2015.
If you want to attend the class, please send Peter an email: baphomet[at]massivevoodoo[dot]com
As soon as he receives your mail, he will provide you with all necessary information. If you have any questions, please feel free to send him an email, too.
Cheers,
your MV-Team
↧
Musica
↧
Review: Scale Model Challenge 2014

Hi!
Better late than never we bring you the jungle's review of this years Scale Model Challenge, issue 2014. If you are interested to find more event reports, check this link!
The Scale Model Challengewas a blast, really. A great weekend full of miniatures, tanks, planes, colours, dioramas, miniature painter friends and more! Massive Voodoo arrived at the Konigshof in Veldhoven on Saturday and we did spent some time to say hello and prepare our booth. After this we went for the gym, some played basketball, some took a swim in the pool and others slept. Relaxation time as we knew what was ahead of us this Saturday night and Sunday - the day of the show!
The maze of Konigshof, you have at least a thousand of these hallways

Robert Crombeecke, serious face selfie with Roman in the bar.

It was late at night when we decided to drink our last tiny beer.

A little sleep later it was time to start into Sunday and see the halls of the Scale Model Challenge fill up with visitors, contest painters and many hobby friends.
This was just too epic!

The contest area, from far ...

Vendors, vendors, vendors ...

Impressions ...

The Scale Model Challenge Best of Show Prizes!

... and miniatures!

_____________________________________________________________________________
Philip says:
"As expected the SMC 2014 was amazing. And it was even larger than last year! I especially was happy to see more german figure painters than 2013 and my Berlin friends. Next year they need to put up more tables for the figures! It was pretty cool to enjoy all the good stuff the event and location offers. Dinner, sports area, comfy beds, and last but definitely not least an awesome show!
I am already looking forward to SMC 2015!"
_____________________________________________________________________________
As usual when you have a great time it runs by fast. We were managing our booth, Raffa and Roman did some judging work with really nice judging colleagues, Oliver held his first painting class, Sanne, Phil and Bene kept an eye on the booth and in between we did greet and talk with painter friends and people who were interested in the aspect of Fantasy Miniature Painting.
Ough! Ough!


Massive Voodoo Insta-Bases, soon!

There were those serious guys all around:


And those not so serious ones:


Roman says:
Well, it was a beautiful and great time, but it went by far too quick. It was really nice to meet up with the dutch painter community and see a lot of friends again, having talks about projects and miniatures and it was also great to get to know some new faces. What impresses me the most on the Scale Model Challenge is how it grows every year in its size and quality. I mean the organisation is running so smoothly and it looks all perfect. Thanks to the Team behind the SMC!!
_____________________________________________________________________________
Some more Impressions, thanks to Phil who took those beautiful photos
- first Oli at his painting class:


The Vendor Hall:


The Contest Area:


Judges at work:


It was a truely great day!
Perfect organisation, great people, great athmsphere and a lot of fun!
We can only recommend to you that if you find the time next year do a little trip to Veldhoven to not miss this event. It is just superb and they even got plans to make it even bigger and better for next years issue!
Big thanks to Ron, who came by our booth and brought Massive Voodoo a birthday gift to MV's 5th Anniversary! So great, Ron! Thank you very much!

If you want to see all the photos done by Phil, check this link!
And here are even more reports from different sources!
The number speaks for itself, a great show!
EVENT REPORTS
Report on Corvus Miniatures
Report on Mr Lee's painting Emporium
Report on DieVincis;part 1part 2
Report in Painting Buddha
Report on Maggie Miniatures
Report on Cursed Monkeys
EVENT PHOTOS
Photos by Maggie Miniatures
Pictures by Flemish Priminitives
Photos by Happy Painting - der Hobby Blog
Photos by Peter from Scars Miniature Madness
Collection of pictures by Kurt Mollers
Pictures by AGMF club (including many club stands pics)
VIDEO REPORTS
Video by the Cursed Monkeys
A video impression by Hired Guns
Video by Corvus Miniatures
* check back regularly as we will extend this list over time*
* check back regularly as we will extend this list over time*
Kurt Möller's Facebook photo album (555 images, focus Scale Model) - See more at: http://www.paintingbuddha.com/blogs/news/17228895-report-scale-model-challenge-2014#sthash.6G6TLBh4.dpuf
↧